Top 10 FAQs about Buying Half a Hog

chalk_pig_3.1.png

How much meat do I get with half a hog?

You will receive between 70-80 pounds of meat ready to go in your freezer. The hanging weight of half a hog can vary, but is usually around 100 lbs.  Once the meat is cut from the bone and packaged some water weight is lost to evaporation so it yields 70-80% of the hanging weight.


How much freezer space do I need for a ½ hog? 

About 4 cubic feet.  Do you remember when all we used were the Top Freezer Refrigerators? The freezer unit was on top the refrigerator?  Those were about 4 cubic feet.  Or the freezer portion of a Side By Side Freezer Fridge would also hold a ½ hog.


What is the hanging weight?

The hanging weight is the weight of the animal once the head, hide, feet, and entrails have been removed. This is the weight you will be charged by. It’s the most fair way to charge because different cutting preferences will yield different weights of packaged meat. You have the option of keeping the soup and broth bones as well as organ meat.

 
chalk hog.jpg

Can I customize what cuts I want?

Yes.  If you preorder your half or whole hog we can ask the butcher to cut and wrap according to your wishes. You have choices like what types of sausages you want made, how big your hams and roasts are, how thick you like your pork chops, whether you want Canadian Bacon or pork chops made.


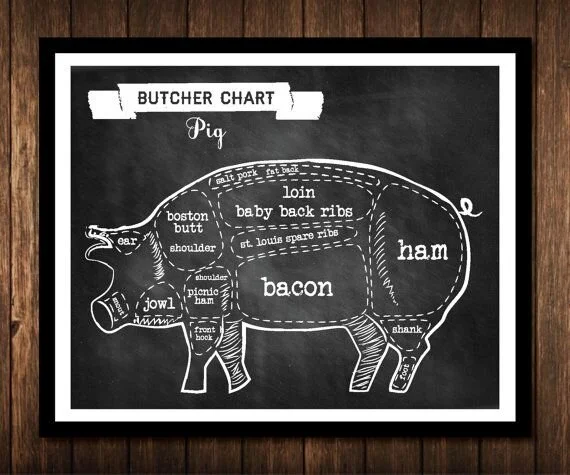
What cuts are available with a half hog?

A hog is very customizable. You could grind the whole thing or smoke and cure the whole thing and it will still be delicious! Half or whole hog options are the same, you just get double the amount with a whole hog.  The available cuts include pork chops, Canadian Bacon or loin roasts, hams, ham hocks, tenderloin, roasts or shoulder steaks, bacon, sausages, ribs, organ meats, bones and the head if you want it.


When I buy a half hog do I get the front half or the back half?

When you buy a half hog you get a little bit of everything. The hog will be split down the spine, down a natural seam and you end up with two identical halves.


Are your pigs butchered on site or do they have to travel?

It depends. Although we would really love to have a mobile butcher come to the farm, if the entire animal is not presold we cannot legally do this. If we sell any individual cuts of meat in our farm store or at the Farmer’s Market it needs to be USDA inspected, and this can only be done at a USDA inspected facility. Mobile butchers are not USDA Inspected. Another factor is timing. We are having to schedule our butcher dates 12 months in advance, before our animals are even born, thank you covid. So this means that you too as the customer would need to put down your deposit and wait for a butcher date to be available. It requires a longer wait time and a layer of complexity that most aren’t aware of. We do however trailer our own animals and take charge of loading them in the most stress free way we can. We have gotten pretty good at this and most of the time our animals calmly walk right onto the trailer, never breaking a sweat or elevating their heart rate. We always get them settled the night before so if they did have any adrenaline from the trip they have time to relax overnight.

 
Print-0058.jpg

Do I pickup and pay for my meat at the butcher?

No. We take care of interacting with the butcher for you. We deliver the animal, hand over your cutting instructions, pay for the processing and pick up the meat for you. We know this process can be overwhelming and we want to make it as easy on you as possible. Your hog’s butchering costs are included in the price you pay us.


How long will it take our family to eat a half hog?

It depends on how frequently you cook at home and the number of people you’re feeding.  Our family of 5 (2 adults and 3 young children) eat a whole hog a year.  We also eat a quarter cow, a whole lamb and 60 chickens in a year’s time.  We do a lot of our own cooking, and you probably would too if you had it sitting in your freezer ready to go.


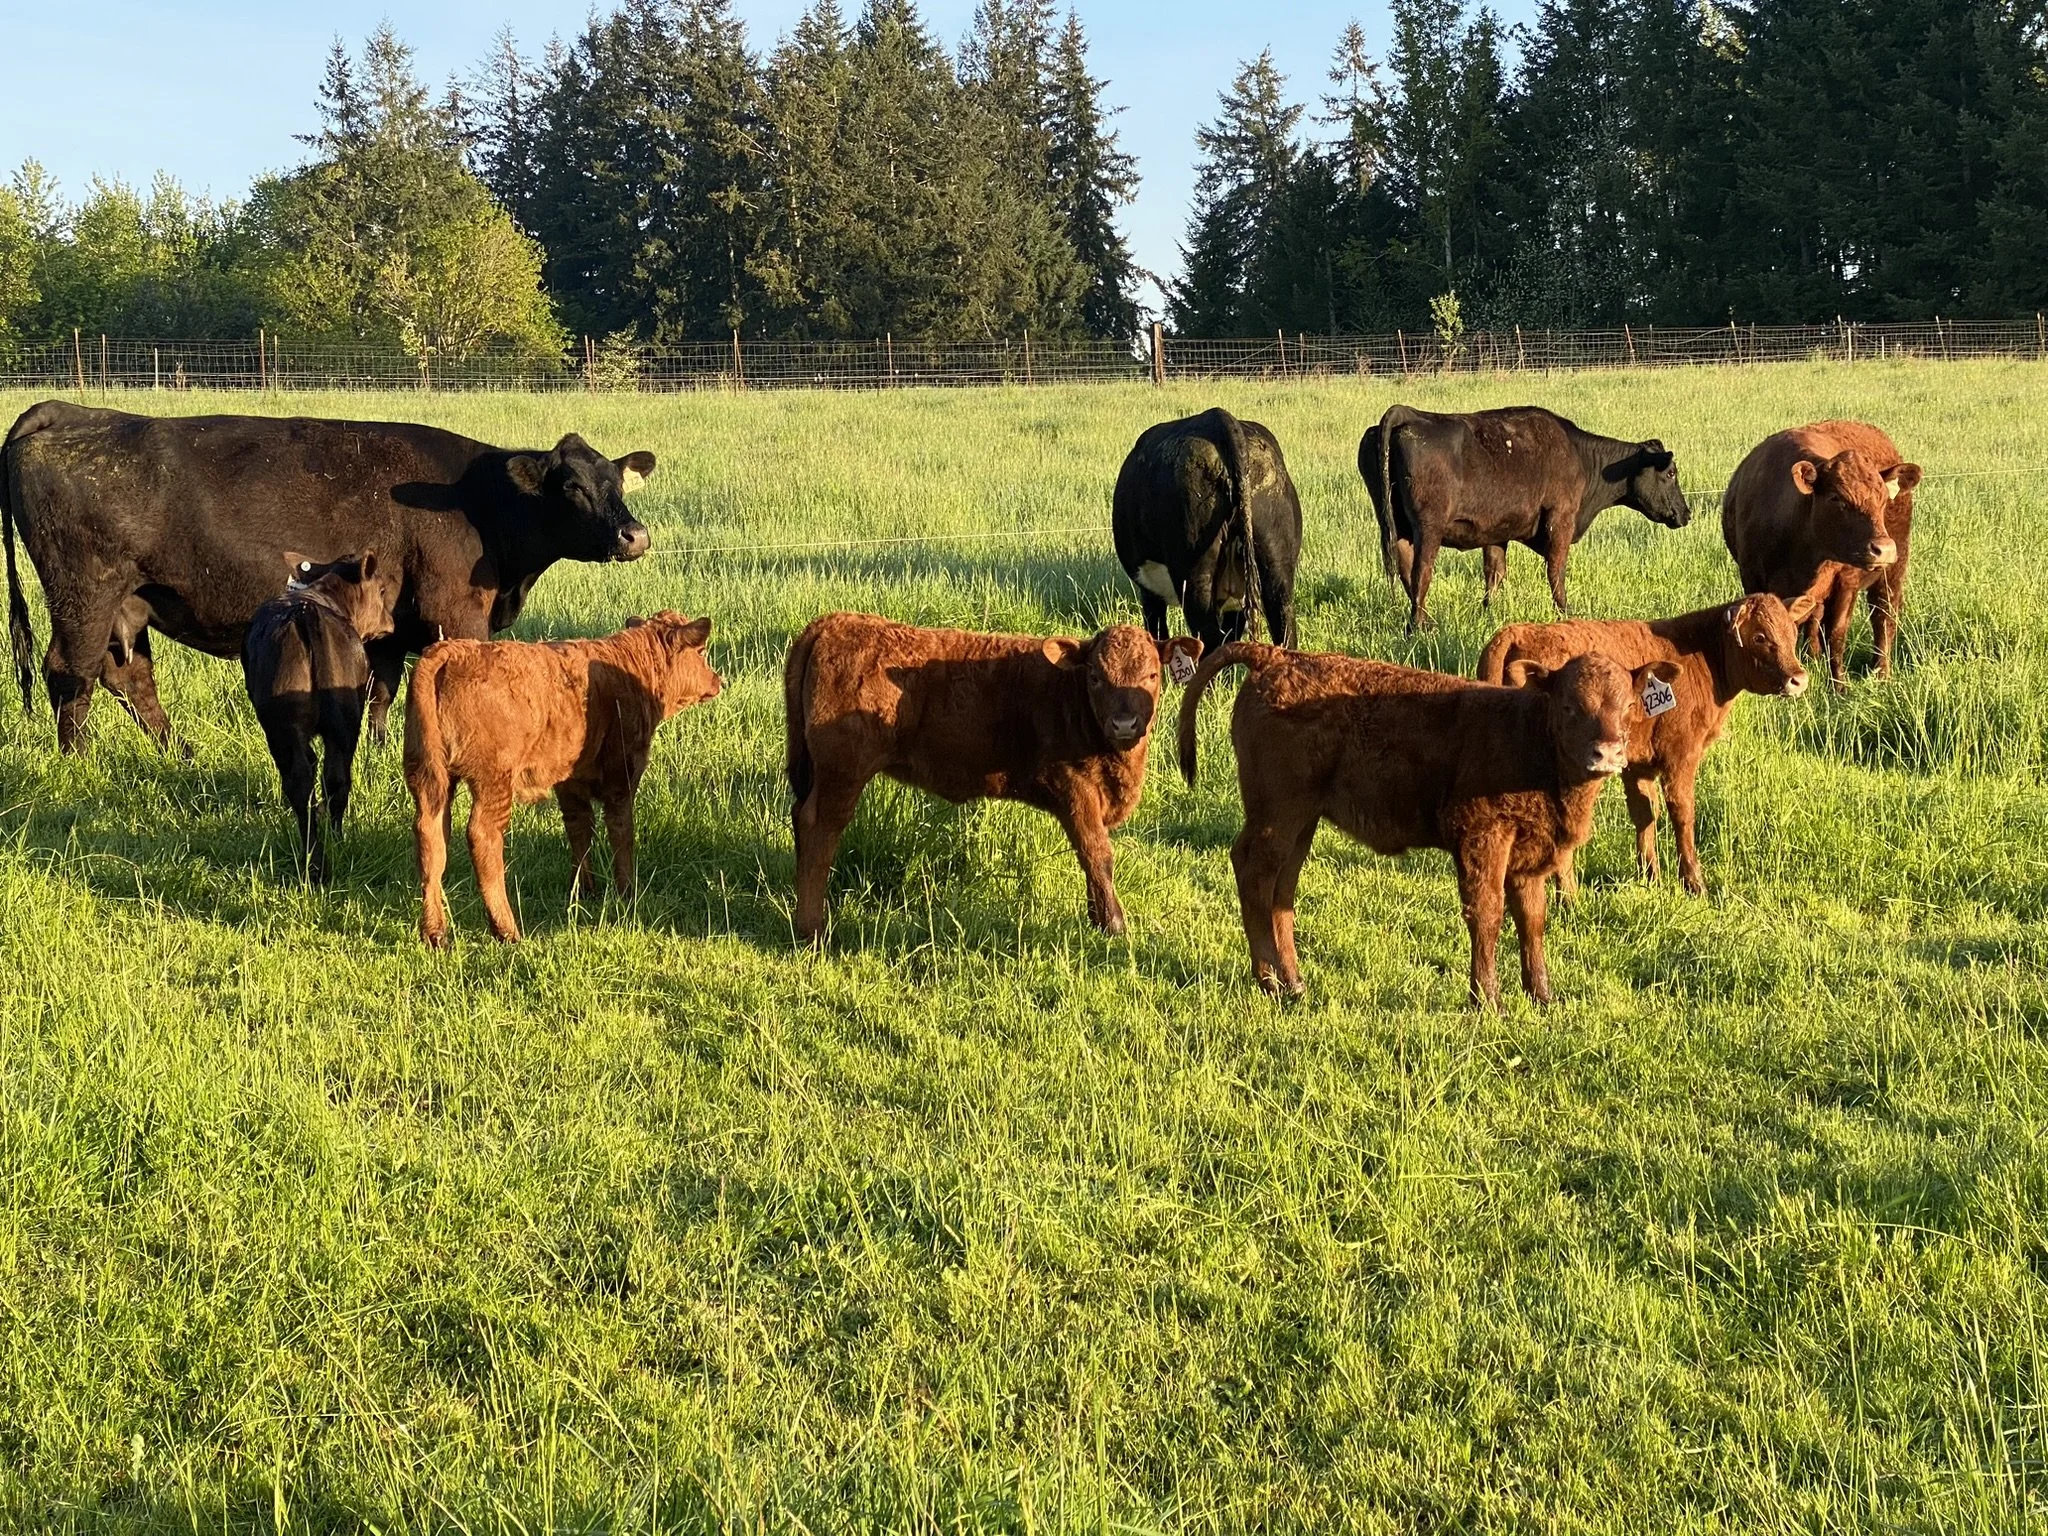
Can I come visit and see where/how the pigs are raised?

Print-0031.jpg

Yes! We would love that! And you will leave feeling happy about the type of life our hogs live. Frolicking in big pastures, free to socialize with littler mates, in the open air and sunshine, foraging for roots, acorns, nuts and bugs.


How do I reserve a half hog?

Just jump over to our website and make your deposit. This saves your place in line and the deposit amount is taken off your final cost at the end. Your deposit helps us cover feed costs and processing costs so that we don’t have to go in the hole to get a final product to your table.

Still want to know more? Check out this blog post What Do I Get With A Half Hog

How To Brine and Roast the Perfectly Moist Holiday Turkey

roasted thanksgiving Turkey rhee drummond.jpg

This turkey recipe is perfect for any holiday, but especially Thanksgiving. It combines a sweet herb brine with oranges and rosemary then baked to perfection with a garlic herb butter. It is simple and delicious, your guests will be impressed!

Here are the step by step instructions:

FOR THE Brine

  • One 12-20 lb Nourished With Nature Pasture Raised Turkey

  • 10 cups water

  • 3 cups apple cider

  • 3 oranges peeled

  • 1/3 cup minced garlic

  • 3 sprigs fresh rosemary

  • 5 sprigs fresh thyme

  • 4 bay leaves

  • 1 ½ cup salt

  • ¼ cup whole peppercorns

  • 2 cups brown sugar (or coconut sugar, raw sugar, or honey)

FOR THE Herb Butter

  • 1 ½ stick unsalted butter room temperature

  • 2 Tbsp. minced fresh rosemary

  • 2 Tbsp. minced fresh thyme

  • 2 Tbsp. minced fresh sage

  • 3 Tbsp. orange zest

TO STUFF INSIDE

  • 1 onion, peeled and quartered

  • 1 lemon, quartered

  • 1 apple, quartered

  • 1-2 sprigs fresh rosemary, thyme and sage

Brine Ingredients

Brine Ingredients


Brining Process

Use a fresh turkey or thaw completely before brining.

Brine your turkey for 18-24 hours before roasting.

1. Combine water, apple cider, orange peels, garlic, rosemary sprigs, thyme sprigs, bay leaves, salt, peppercorns and sugar in a large pot and bring to a boil. Turn off the heat immediately, cover, and allow mixture to come to room temperature.

2. Place your thawed turkey in the pot with the brine or use a brining bag, add additional cold water if needed to cover the bird entirely.

3. Allow to brine in the fridge for 18-24 hours before roasting.

Combining brine ingredients

Combining brine ingredients


Roasting Process

1. After brining, remove the turkey from the brine and rinse thoroughly under cold water. Then soak your turkey in a pot full of fresh water (you could also use the sink) for 20 minutes. Pat dry. Discard brine. This soaking process will decrease the likelihood of too-salty gravy.

Rinse the bird after brining

Rinse the bird after brining

2. Preheat the oven to 325 degrees F. Adjust your rack in the oven so the turkey will sit in the center.

3. Stuff the cavity of the bird with apple, lemon, onion and herbs.

4. Truss the bird and place it breast side up on a rack in a large roasting pan.

5. Mix the butter with the herbs and orange zest and using your hands rub the butter mixture all over the turkey, covering every inch of the skin.

 
Rub it down with herb butter and orange zest for the second half of baking.

Rub it down with herb butter and orange zest for the second half of baking.

6. Cover the turkey tightly with foil.

7. Place in the oven and roast for about 13-15 minutes per pound, or until internal temperature is 170 degrees F.

*Make sure you test several places on the turkey with the thermometer. The meatiest part of the thigh is a good spot, but don’t touch the thermometer to the bone.

8. With 30 minutes remaining remove the foil and continue cooking until skin of the turkey turns golden brown.

9. Remove from the oven and let rest tented with foil until you are ready to carve and serve. Reserve pan juices to make gravy.


Get ready to enjoy the most deliciously moist and nutritious Holiday turkey!

Comment a picture below when your turkey is done!

Recipe adapted from the Pioneer Woman


Grass-Fed Lamb Liver Mousse

Last October we were on our way home from Blake’s Grandmother’s funeral in Utah and we stopped into this restaurant, Cultured Caveman, in Portland. Going into a restaurant by ourselves, without out little people, is a special treat which always ends up being a hard decision! We had heard of this paleo restaurant that served local and grass fed meats and fermented foods.

So we had to try it!

IMG_6298[1].JPG

Just our kind of thing!

And by the way, I wouldn’t have hesitated to take my kids into Cultured Caveman because they would have totally eaten everything from the menu, and I totally believe in feeding my kids the best.

They just think this type of food is normal, and we know how special it is to have paleo lamb liver and sugar free kombucha served to us in a sit down restaurant.

It was very good! We loved the kombucha, we loved the pesto, but we especially fell in love with the lamb liver pate!

IMG_6399.jpg

So we came home and recreated it!

You guys know how healthy is is to eat organ meat from healthy animals raised on pasture. The liver is a very nutrient dense food, here is what Sally Fallon Morell author of Nourishing Traditions says,

“Liver was considered a sacred food in almost all traditional cultures, necessary for strength, stamina…There is good reason for the reverence accorded to liver, because of all the foods in the human diet, liver is the most nutrient dense.

“In addition, liver is an excellent source of phosphorus, iron, zinc, copper, vitamin B, vitamin B6, choline, biotin and folate. Liver actually contains more vitamin C per gram than apples or carrots. In addition, chicken, duck and goose liver are among our best sources of vitamin K2.

“By the way, cooking lamb or beef liver, rich in vitamin A, in lard or bacon fat, rich in vitamin D, provides a synergistic combination of these two key vitamins.”


Lamb Liver Mousse

INGREDIENTS:

IMG_4054.jpg
  • 2 TBSP onion finely chopped

  • 1 tsp Nourished With Nature Lard (or olive oil)

  • 1 garlic clove, minced

  • 1/3 cup cognac or other brandy

  • 6 oz. Nourished With Nature lamb liver, trimmed (3/4 cup)

  • 5 Nourished With Nature egg yolks

  • 1 cup whole milk

  • 1/4 cup flour of your choice

  • 1 1/4 tsp natural trace mineral salt (like Redmond)

  • 1/2 tsp black pepper

  • 1/4 tsp nutmeg

  • 1/4 tsp ground allspice

  • 3 TBSP Kerrygold butter + 3 TBSP bacon grease or lard

  • 2-3 bay leaves for decoration

*Special Equipment: a 2 1/2 - 3 cup ovenproof croc, terrine, or loaf pan


INSTRUCTIONS

Preheat oven to 350 deg F with a rack in the middle of the oven

Cook minced onion in lard in a large heavy skillet over medium heat, stirring occasionally, until softened, about 4 minutes. Add garlic and cook, stirring, 1 minute. Remove from heat and carefully add Cognac. If the alcohol ignites, shake skillet. Boil to reduce until about 2 tablespoons remains, 1-2 minutes.

IMG_4052.jpg

Transfer to a blender, add livers and yolks, then puree until smooth. Add milk, flour, salt, pepper, nutmeg and allspice. Blend until smooth. Pour into loaf pan, skimming off any foam.

Put loaf pan into a larger baking pan and bake in a water bath until mousse is just set and a small sharp knife inserted in center comes out clean, about 55 minutes.

Melt butter and bacon grease in a small saucepan over low heat, remove from heat and let stand 3 minutes.

Arrange bay leaves decoratively on top of mousse. Skim froth from butter, then spoon enough clarified butter over mousse to cover it’s surface, leaving milky solids and bacon bits in bottom of saucepan.

Chill mousse completely, uncovered, about 4 hours. Then it can refrigerated for up to 5 days.

Enjoy with veggies such as carrot and celery sticks, sliced cucumbers or radish, broccoli florets, crackers or toasted baguette slices.

IMG_4051.jpg

Enjoy this nutrient dense version or organ meat.

It’s surprisingly mild flavored and palatable, give it a try! And be well nourished!

Reserve a whole lamb because buying in bulk does save you money and guarantees you liver.

Or just visit our online store to grab your eggs, lard and liver.

***This recipe could easily be made with chicken or beef livers too! ***

Homemade Honey Vanilla Ice Cream

F87F7BF2-2AE8-4F19-85F5-7F54D233878C.jpg

When it’s summertime and it’s hot outside, everyone loves this thick creamy custard base ice cream with vanilla bean flecks throughout!

  • Birthday parties

  • Sunday Dinners

  • Just because…

This recipe uses quality ingredients, full of good fats highly revered by the Weston A. Price group!

Healthy whole fats like grass fed milk and cream, the good cholesterol in pastured eggs and the honey used to sweeten are all nutrient dense foods and you won’t feel guilty about having seconds!

High fat diets are super important for fertility as well as brain development in fetus and babies. Good cholesterol from the eggs helps keep hormones happy and regular for ALL ages.

If you are dairy free you are welcome to substitute the milk and cream for organic coconut or almond milk, just use the boxed kind, not aluminum cans.

Here is what you’ll need:


Ingredients:

  • 9 Nourished With Nature Egg Yolks (only 6 if using large eggs)

  • 1 cup whole raw milk (goats milk, coconut or almond milk is okay to substitute too)

  • 2 cups heavy cream (divided)

  • 3/4 cup honey

  • pinch of salt

  • 1 vanilla bean

  • 3/4 tsp vanilla extract


Instructions:

  1. Combine the milk, honey, 1 cup of the cream and salt in a medium saucepan.

  2. Cut the vanilla bean in half lengthwise and scrape the beans out of the center into the milk mixture. Add the pod too, we’ll take it out later.

  3. Cook over medium heat, stirring occasionally until warmed throughout. Do not boil.

  4. Remove from heat, cover the pan and let steep for 30 minutes.

  5. In a medium bowl whisk the egg yolks together.

  6. Slowly pour the warm milk mixture into the egg yolks, whisking as you go.

  7. Pour eggs and milk mixture back into the saucepan and cook over medium heat. Using a spatula stir continuously until the mixture thickens and coats the back of a spoon.

  8. Pour through a fine mesh sieve to remove any scrambled bits of egg. Add the remaining 1 cup of cream. Stir in the vanilla extract.

  9. Place in an ice bath and stir frequently until cooled.

  10. Cover and refrigerate until fully chilled, preferably overnight. The longer this chills the more creamy it will be! The vanilla bean can remain in the custard mixture until right before you churn.

  11. Using an ice cream churn, freeze the custard according to the manufacture’s instructions. Lots of ice cream salt is the key, and I always have to finish firming mine up in the freezer if I want totally frozen ice cream.

  12. Enjoy!

Tell me in the comments how it turned out!

Luscious Lemon Curd

Lemon Curd is a seasonal treat, straight from the farm.

It signals springtime and helps us use what is abundant- pastured eggs!

This simple, sunshiney recipe uses just four wholesome ingredients: fresh lemons, local honey, grass-fed butter, and our own pastured-raised eggs.

It’s rich, tangy, and bursting with nutrition.

So here is how to make it:

INGREDIENTS:

  • 5 Nourished With Nature Egg Yolks

  • 1/2 cup local raw honey

  • 1/2 cup fresh squeezed lemon juice

  • Lemon zest from fruit

  • 1/2 cup Butter (I like KerryGold)

  • 10 drops Lemon Essential Oil (optional)

INSTRUCTIONS:

  1. Whisk egg yolks, honey, juice and zest in the top of a double boiler pan over simmering water. Any pan or bowl will work, as long as it can be nestled over another pan of boiling water.

  2. Stir with a rubber spatula 6-9 minutes over the pan of barely boiling water. The egg yolks can be quick to scramble so you want to keep stirring and keep the heat medium to low. Stir until it reaches the thickness of yogurt, it might take closer to 12 minutes. You’ll know it’s done when the curd coats the sides of your pan and spatula.

  3. Remove the pan from over the boiling water and stir in the butter. Once the butter is melted run the curd through a fine mesh sieve to remove the zest and scrambled bits.

  4. Stir in lemon essential oil if you want an extra tangy pop of flavor. The essential oil is cold pressed from the rind of lemons so it can be substituted for the zest or, if you’re like me and NEVER get enough lemon, add it in additionally! Do this in the cooling stage as heating this essential oil will void it of it’s nutritional value. It’s also important that you trust the source of your essential oil, as NOT ALL are safe for internal use. Young Living’s ARE. They are labeled “Vitality” when they are generally regarded as safe for ingestion. Email me if you would like to get 25% off essential oils.

  5. Pour into a jar and refrigerate. Curd will thicken as it cools. This can be frozen or kept fresh in the fridge for 10-14 days.

Enjoy!

IMG_6313.JPG